Prerequisites
File uploads are required for file, image, video, and voice messages. This example uses a file message; for other message types, replace the send method and its parameters as needed.
- Create an application in the
Admin Consoleto obtain anAppKeyandSecret.
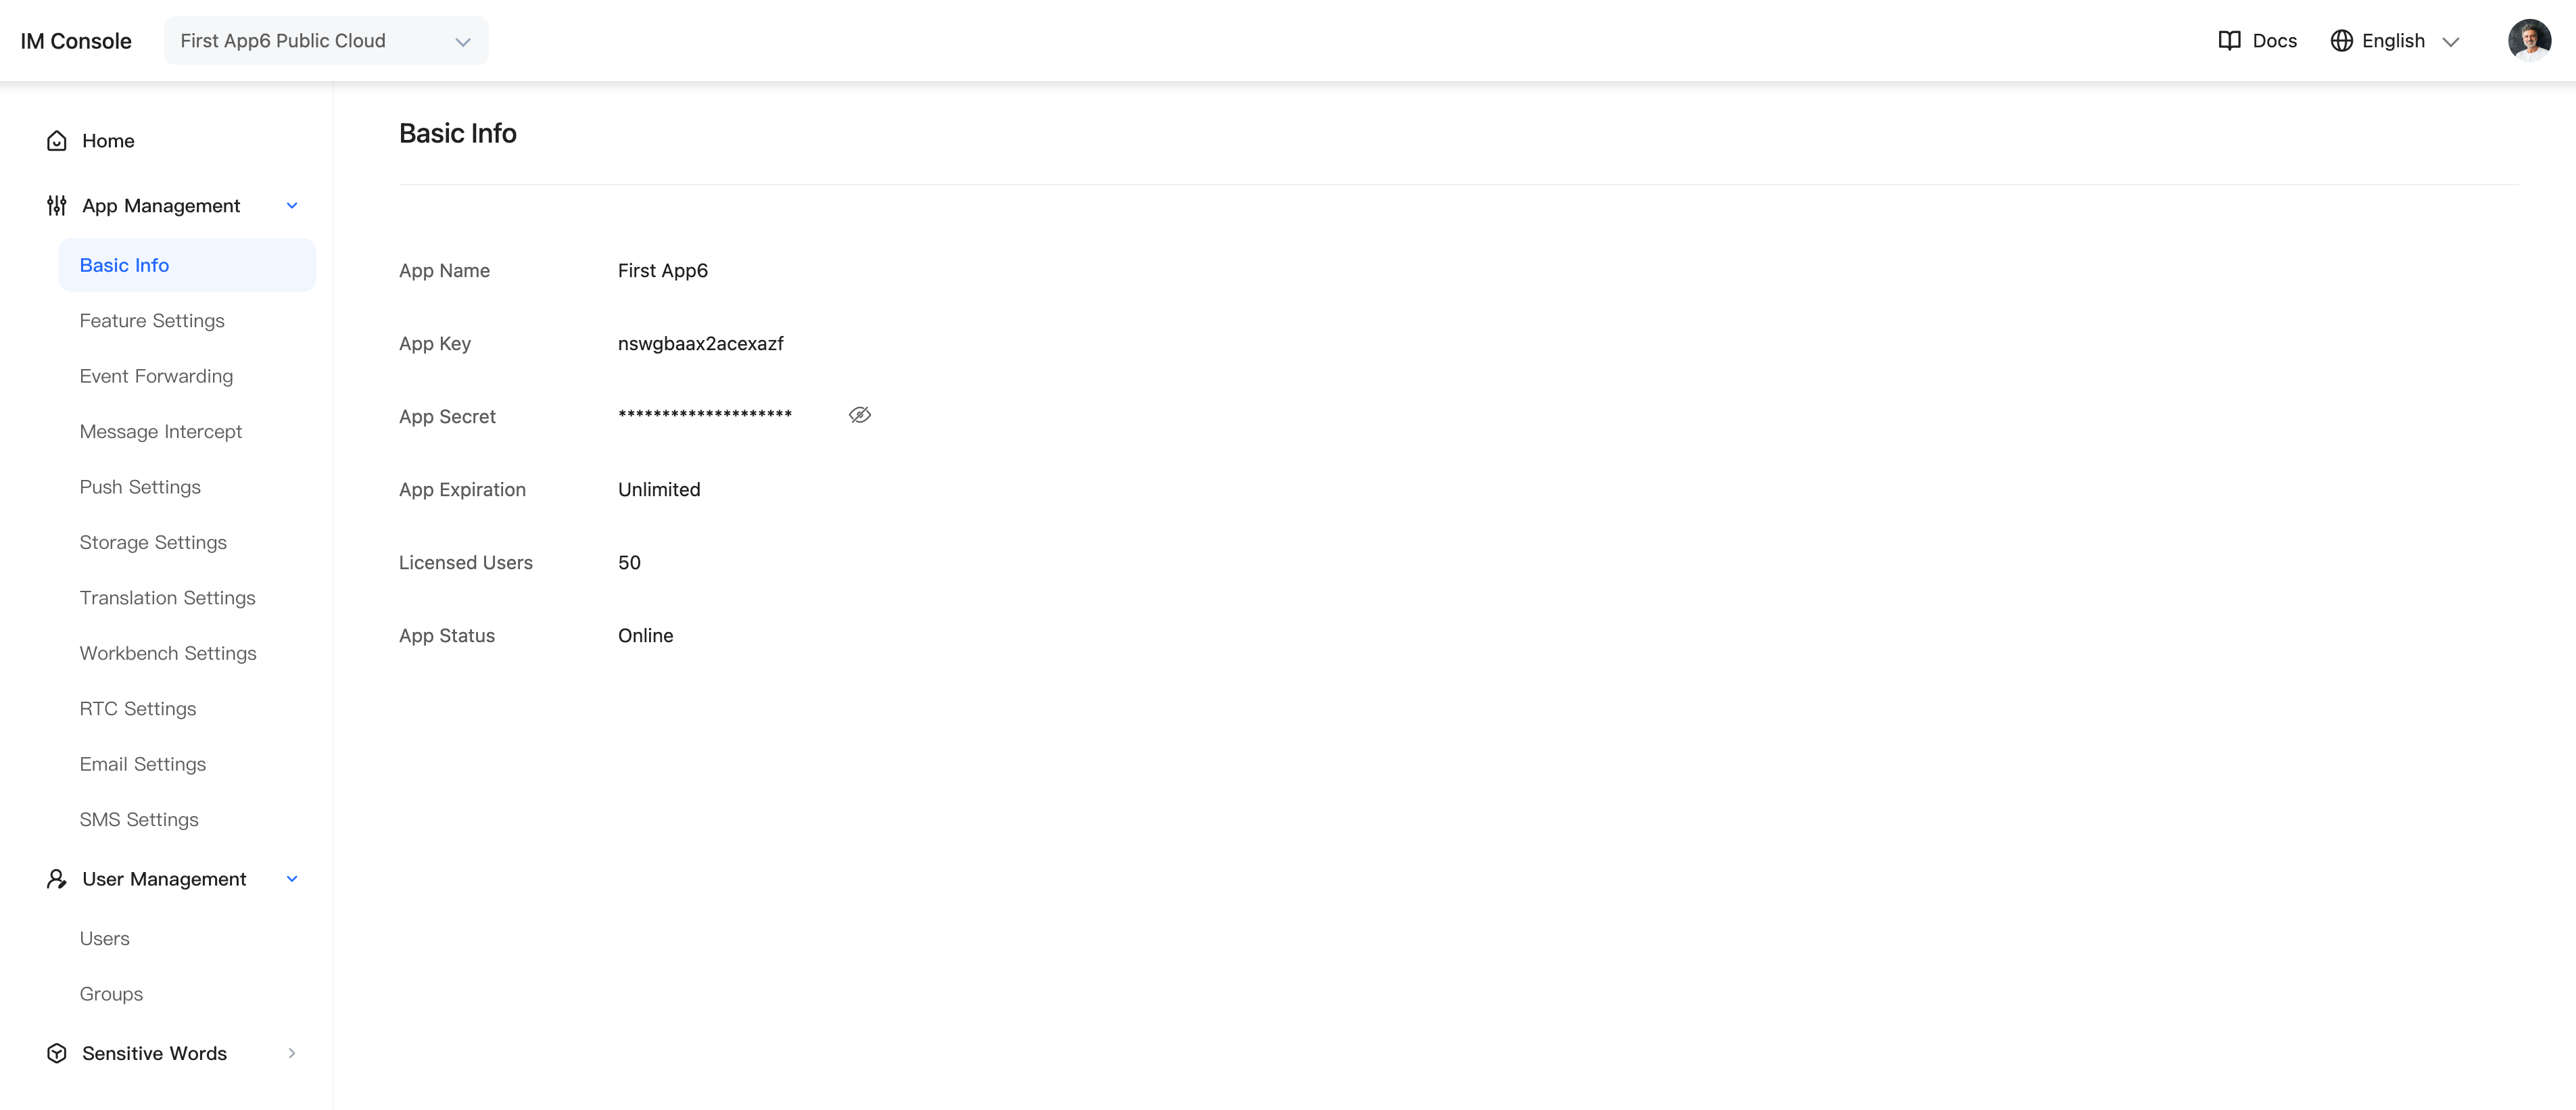
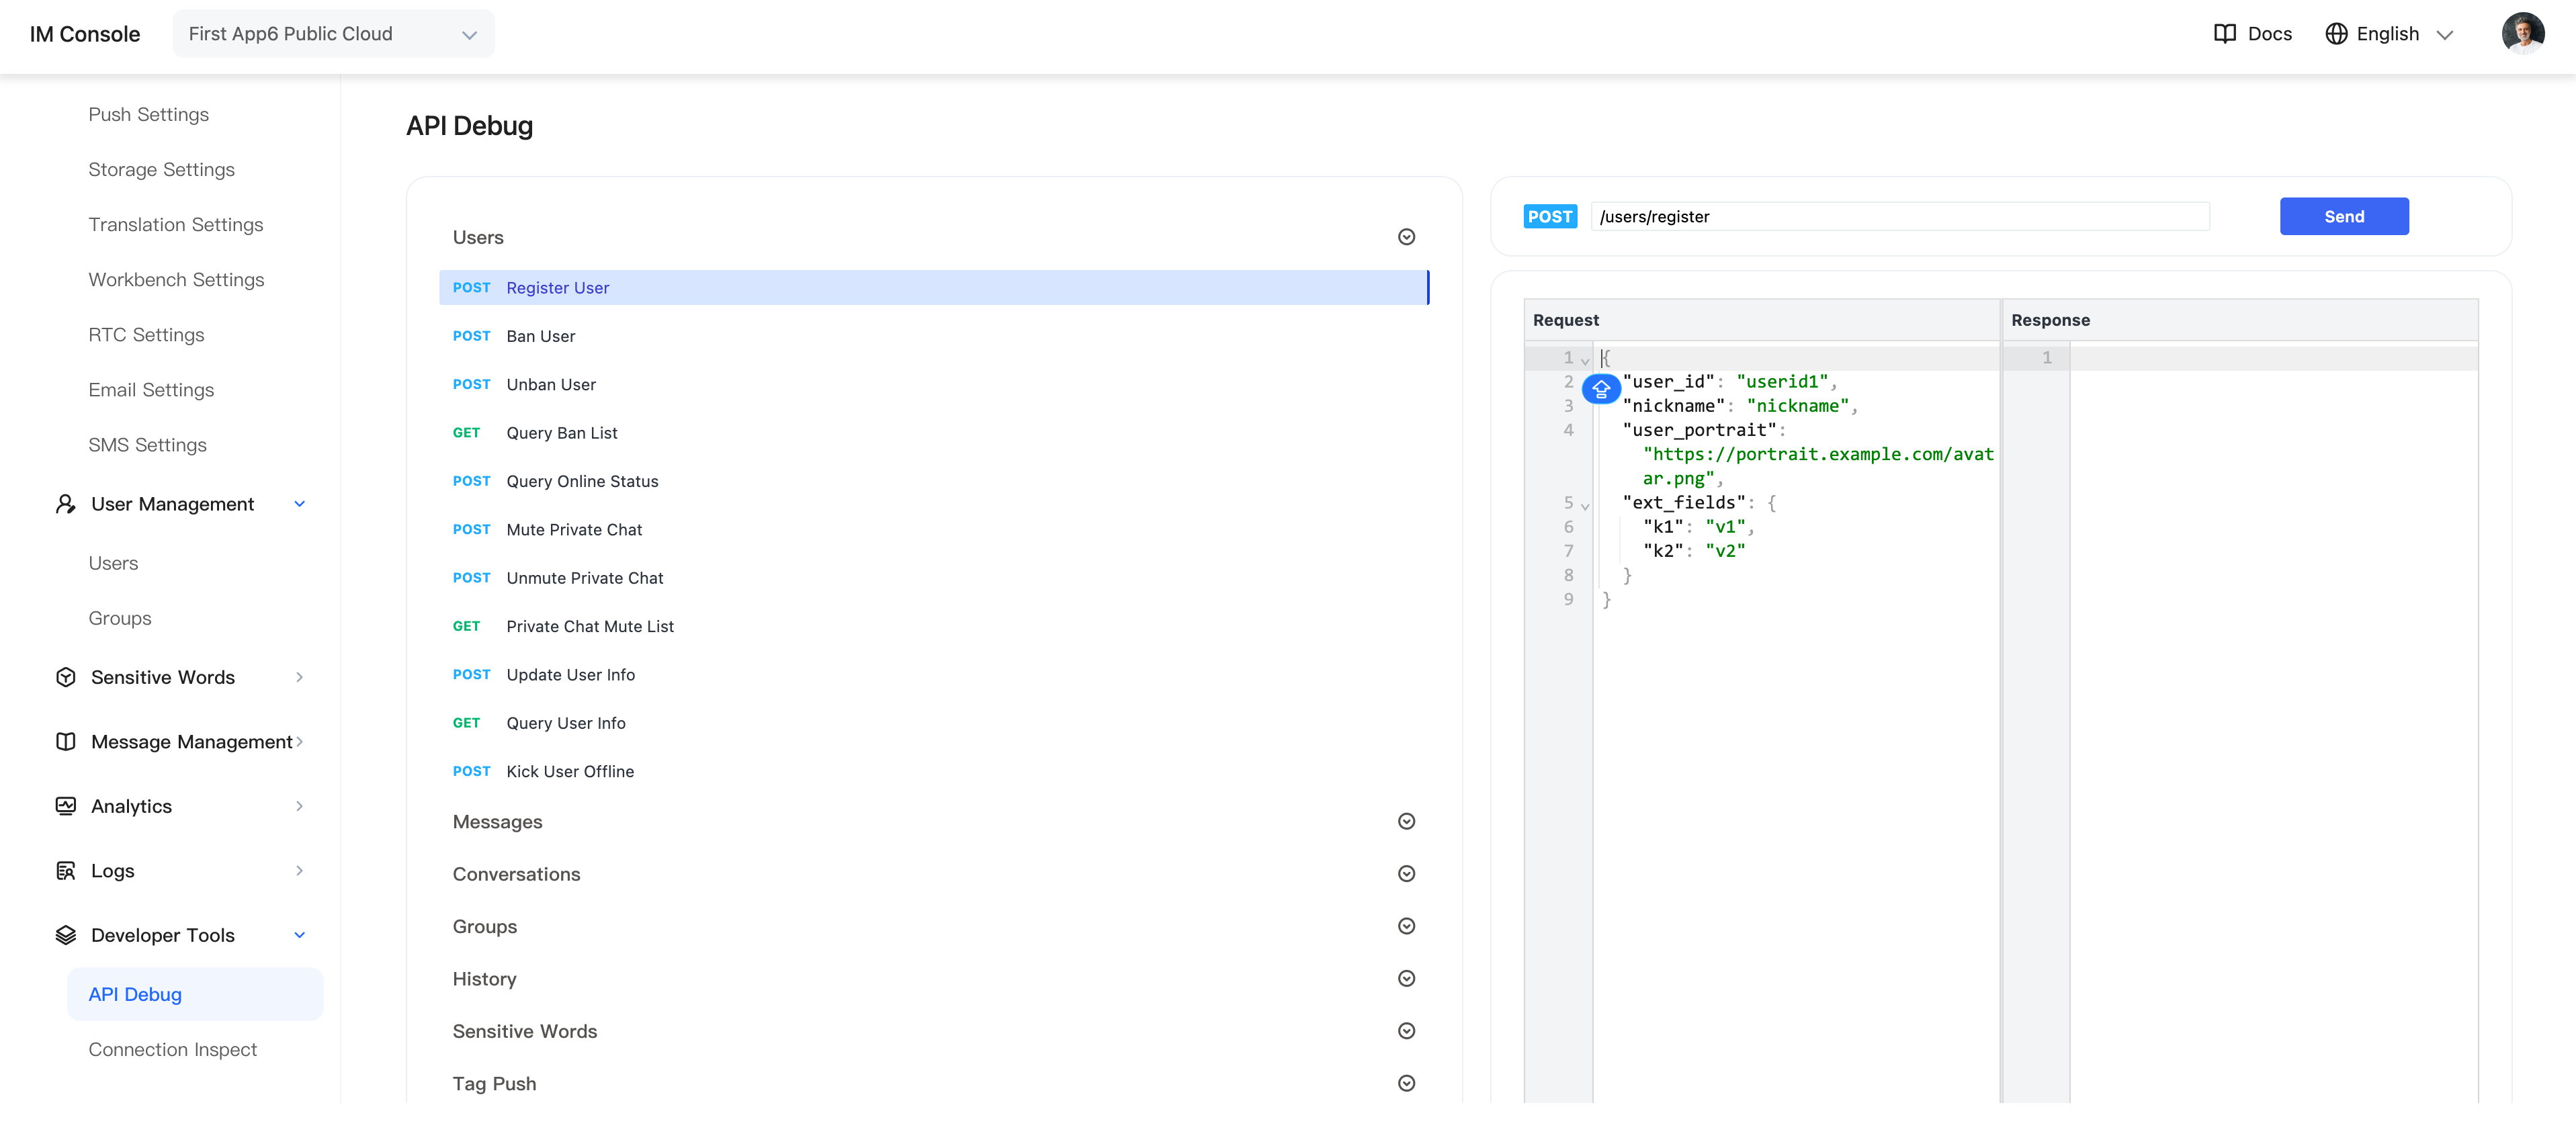
- Call the server API to obtain tokens, or in the Admin Console select Application > Developer Tools > API > Users, then call the user-registration API to obtain two test tokens.
Download the latest
JavaScript SDK.Download the cloud-provider upload SDK: Qiniu SDK or Alibaba Cloud OSS. The example below uses Qiniu.
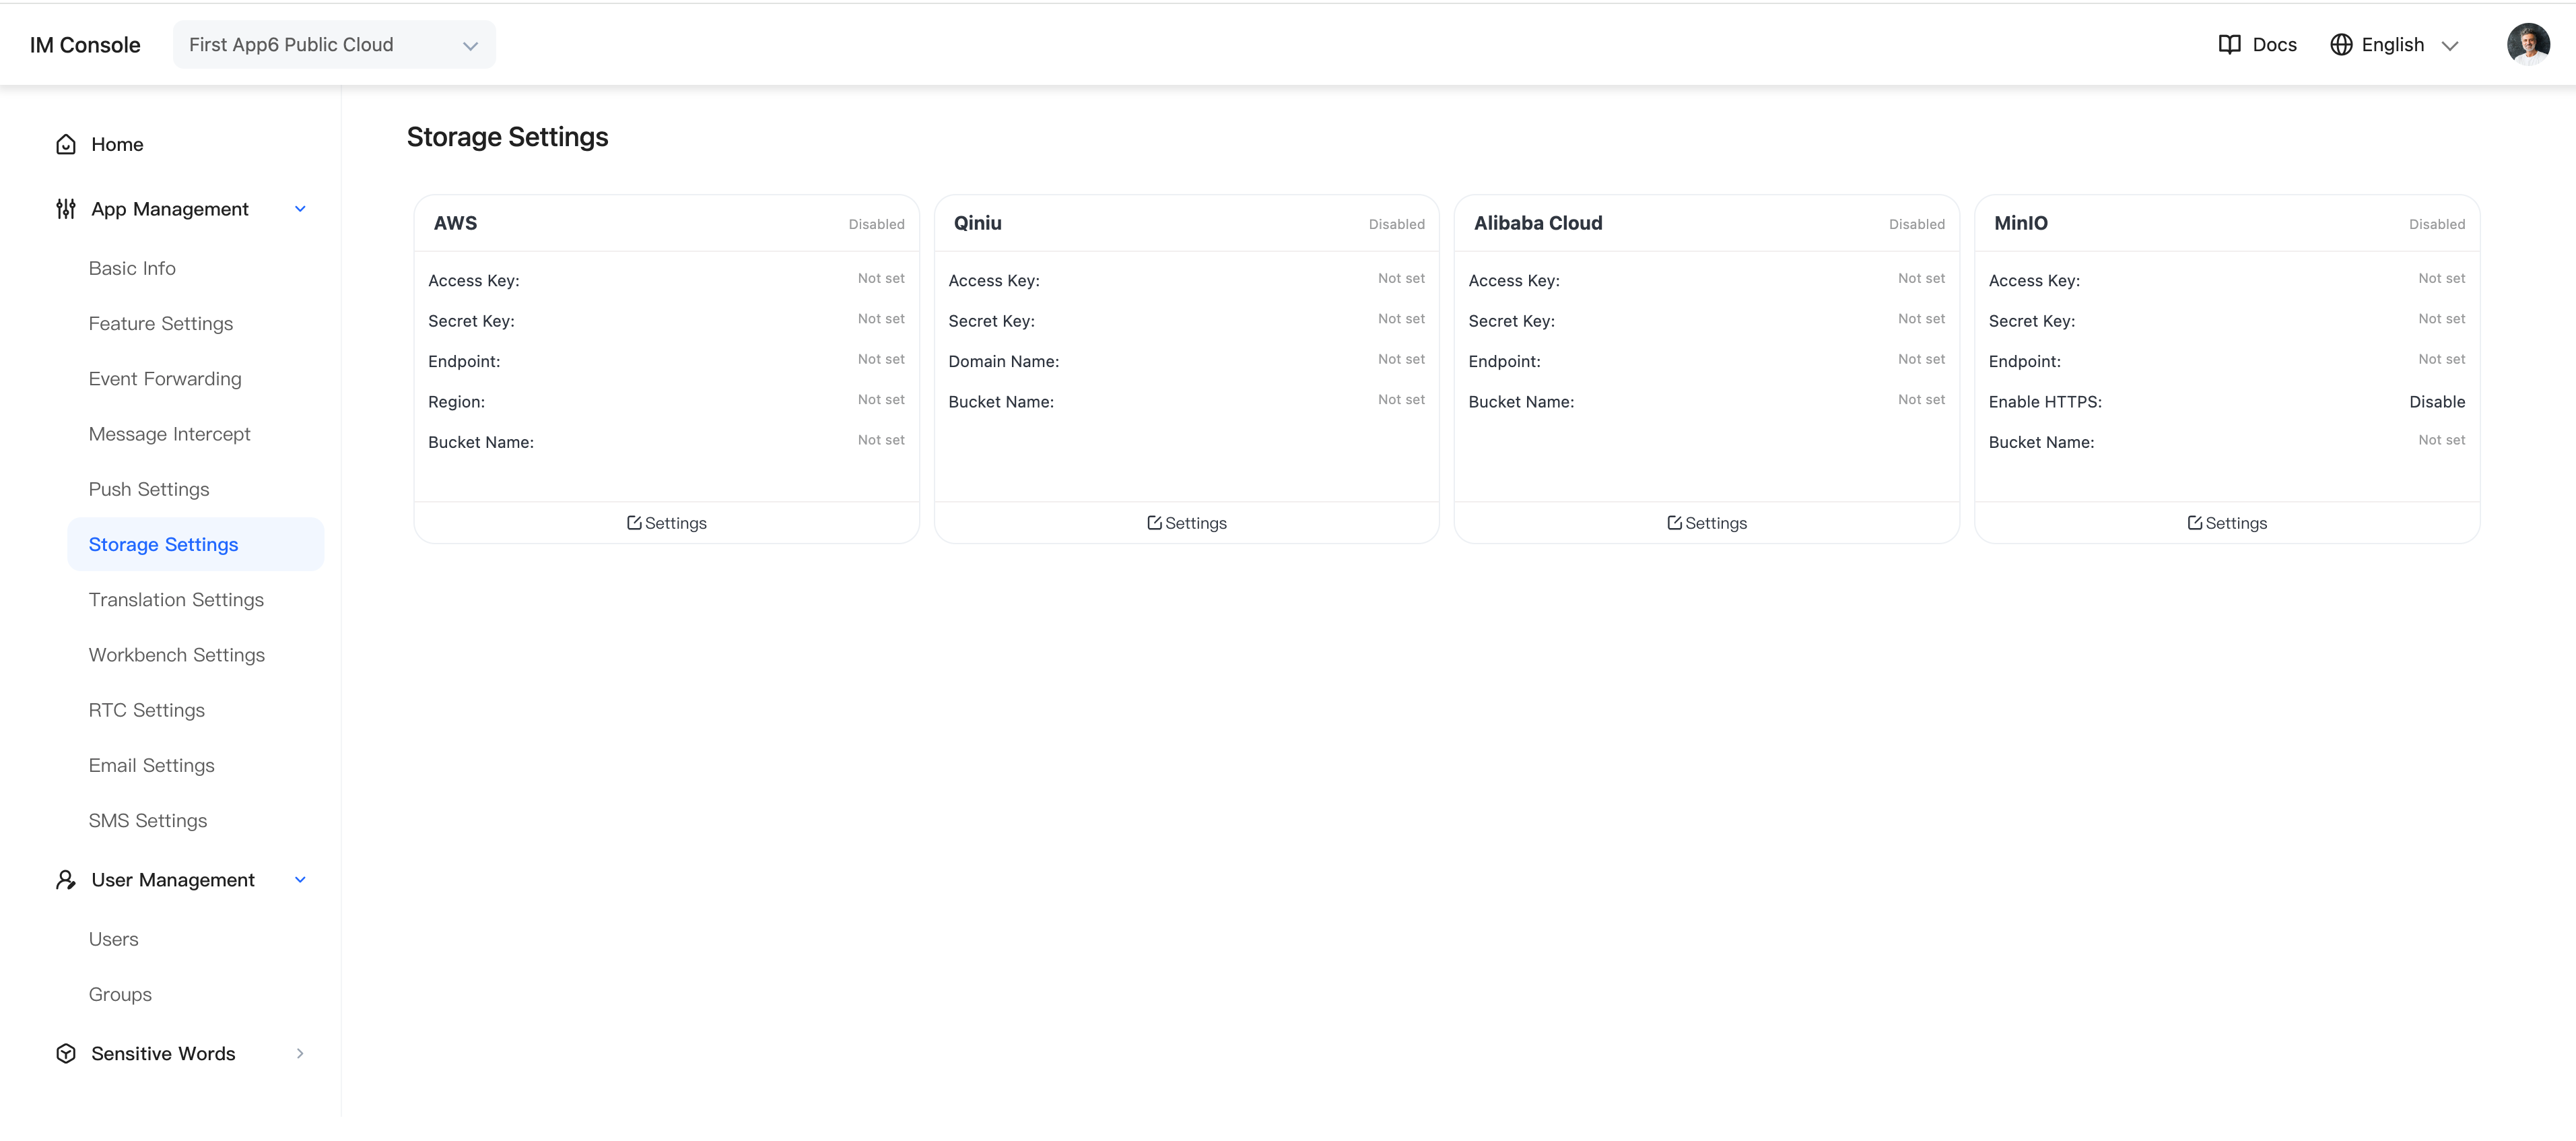
Set the cloud-storage type in the Admin Console. If you use Alibaba Cloud OSS, allow CORS requests from the web in the Alibaba Cloud console.
- Complete the integration by following the documentation.
Workflow
- Import the IM Web SDK.
- Import the Qiniu JS SDK.
- Initialize and configure the upload component.
- Connect successfully.
- Send a file message.
Example
For convenience, the example includes an official test AppKey and Token. Replace them with your own AppKey and Token after testing.
- Create an
HTMLfile nameddemo.html.
- Download juggleim-dev-1.9.0.zip and place
juggleim-dev-1.9.0.jsin the same directory asdemo.html.
- Place qiniu.min.js in the same directory as
demo.html.
- Copy the code below into
demo.html.
- Open
demo.htmlin Chrome to preview it.
<!DOCTYPE html>
<html lang="en">
<head>
  <meta charset="UTF-8">
  <title>JIM</title>
  <script src="./jim-[version].js"></script>
  <script src="./qiniu.min.js"></script>
  <style>
    .container {
      height: 200px;
      width: 600px;
      background-color: rgb(119, 128, 226);
      margin: 200px auto;
      font-size: 30px;
      font-weight: bold;
      border-radius: 10px;
      padding: 4rem;
      box-sizing: border-box;
    }

    .input {
      display: none;
      width: 100%;
    }
  </style>
</head>

<body>
  <div class="container">
    <div>Open the browser console to view the result</div>
    <input type="file" id="file" class="input" />
    <div>
      <span id="percent">0</span>
      <span>%</span>
    </div>
  </div>
  <script>

    let fileNode = document.querySelector('#file');
    let percentNode = document.querySelector('#percent');

    // prepare basic information
    let appkey = 'Your AppKey';
    let token = 'Your Token';
    let userId = 'userId associated with the Token'
    // WebSocket domain name or IP address of the private deployment
    let serverList = [
      'https://demo.im.com',
      'http://demo.im.com',
      'http://10.23.31.111:8080',
    ];

    /*
      Initialize Qiniu file storage
      let jim = JIM.init({ appkey, upload: qiniu });
    */

    /*
      Initialize Alibaba Cloud file storage: OSS provided by the Alibaba Cloud upload JavaScript SDK https://gosspublic.alicdn.com/aliyun-oss-sdk-6.18.0.min.js
      let jim = JIM.init({ appkey, upload: OSS });
    */

    /*
      Initialize AWS file storage: S3Client provided by the AWS JavaScript SDK https://www.npmjs.com/package/@aws-sdk/client-s3
      import { S3Client } from "@aws-sdk/client-s3";
      let jim = JIM.init({ appkey, upload: S3Client });
    */

    //  Step 1: Initialize the SDK; this is required only once globally, using Qiniu as an example
    let jim = JuggleIM.init({ appkey, serverList, upload: qiniu });
    let { Event, ConnectionState, ConversationType, MessageType } = JIM;

    // Step 2: Set the status listener; this is required only once globally
    jim.on(Event.STATE_CHANGED, ({ state, user }) => {
      if (ConnectionState.CONNECTING == state) {
        console.log('im is connecting');
      }
      if (ConnectionState.CONNECTED == state) {
        // user => { id: 'xxx' }
        console.log('im is connected', user);
      }
      if (ConnectionState.DISCONNECTED == state) {
        console.log('im is disconnected');
      }
    });

    // Step 3: Set the message listener; this is required only once globally
    jim.on(Event.MESSAGE_RECEIVED, (message) => {
      console.log(message);
    });

    // Step 4: Connect; call this only once globally. Message and conversation APIs require a successful connection
    jim.connect({ token, userId }).then((user) => {
      fileNode.style = "display: block;";
      fileNode.onchange = sendFile
    }, (error) => {
      console.log(error)
    });

    function sendFile(e) {
      let file = e.target.files[0];
      let message = {
        conversationType: ConversationType.PRIVATE,
        conversationId: 'userid2',
        content: {
          file: file,
          name: file.name,
          type: file.type
        },
        /*
        Custom attributes: use as needed. They are returned in the msg object during onprogress and after the message is sent successfully
        Use case: assign a custom tid when sending a file message, render the message on the page, and use the tid returned by onprogress to
                  update the progress bar using message.tid
        */
        tid: `tid_${Date.now()}`
      };

      jim.sendFileMessage(message, {
        onprogress: ({ percent, message }) => {
          console.log(`${percent}%`, message);
          percentNode.innerHTML = percent;
        }
      }).then((msg) => {
        console.log('send file message successfully', msg)
        e.value = '';
      }, (error) => {
        console.log(error)
      });
    }
  </script>
</body>
</html>
Important
The demo stops after a successful connection. In a production project, select JIM capabilities as needed by following the integration documentation.