Electron provides a message-storage module for offline use and a better user experience. You can think of it as embedding HTML integrated with the JavaScript SDK into Electron to create a desktop application.
This tutorial uses Electron and the IM SDK to build a minimal desktop IM application.
Prerequisites
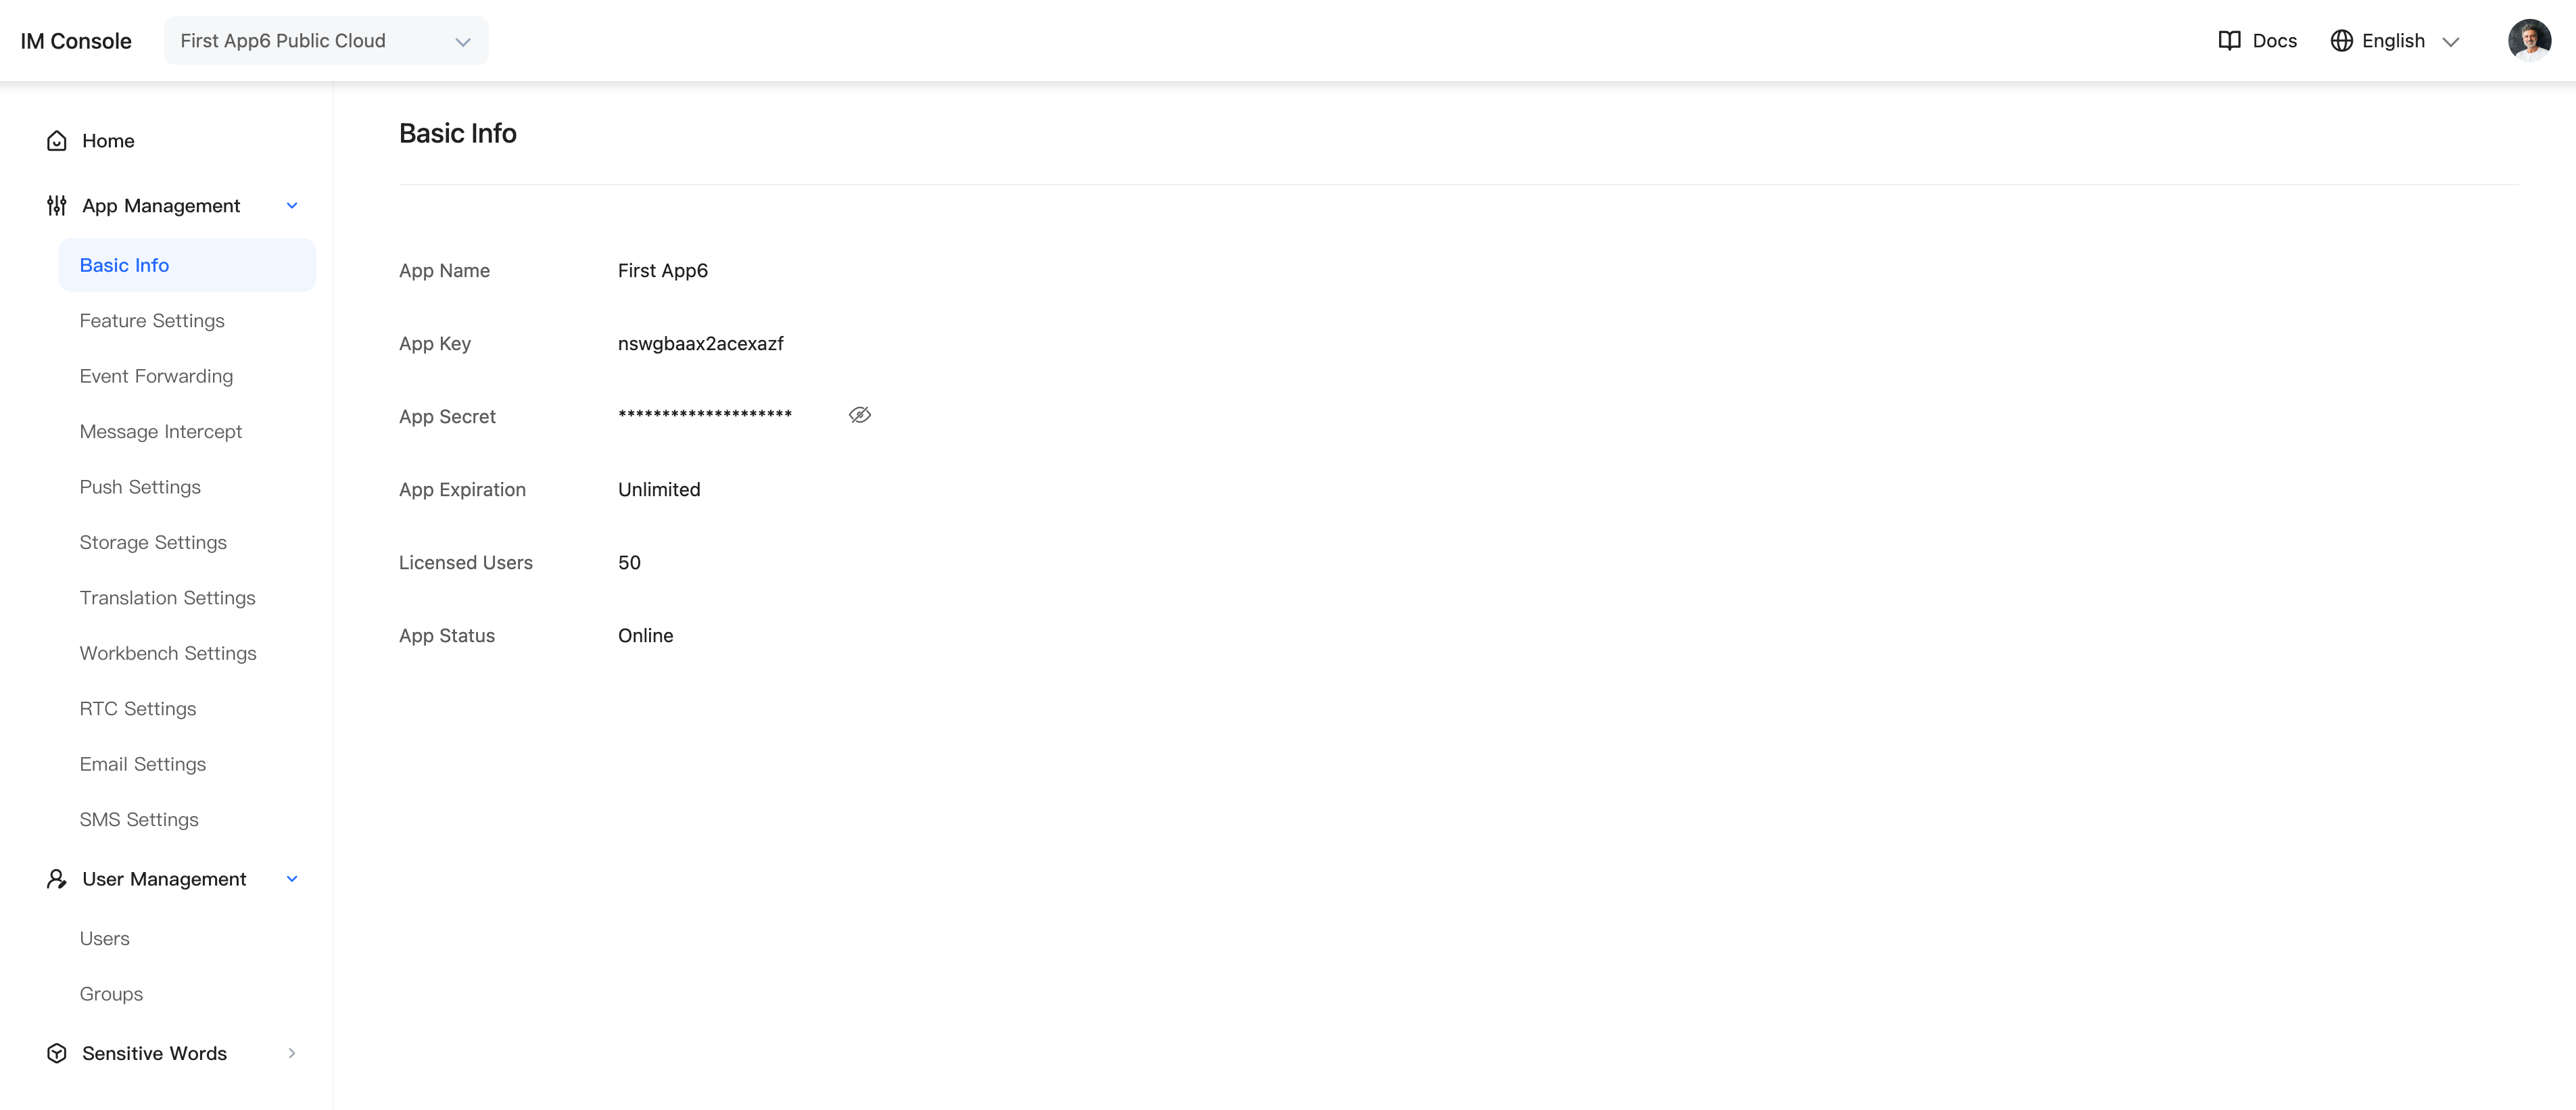
- Create an application in the
Admin Consoleto obtain anAppKeyandSecret.
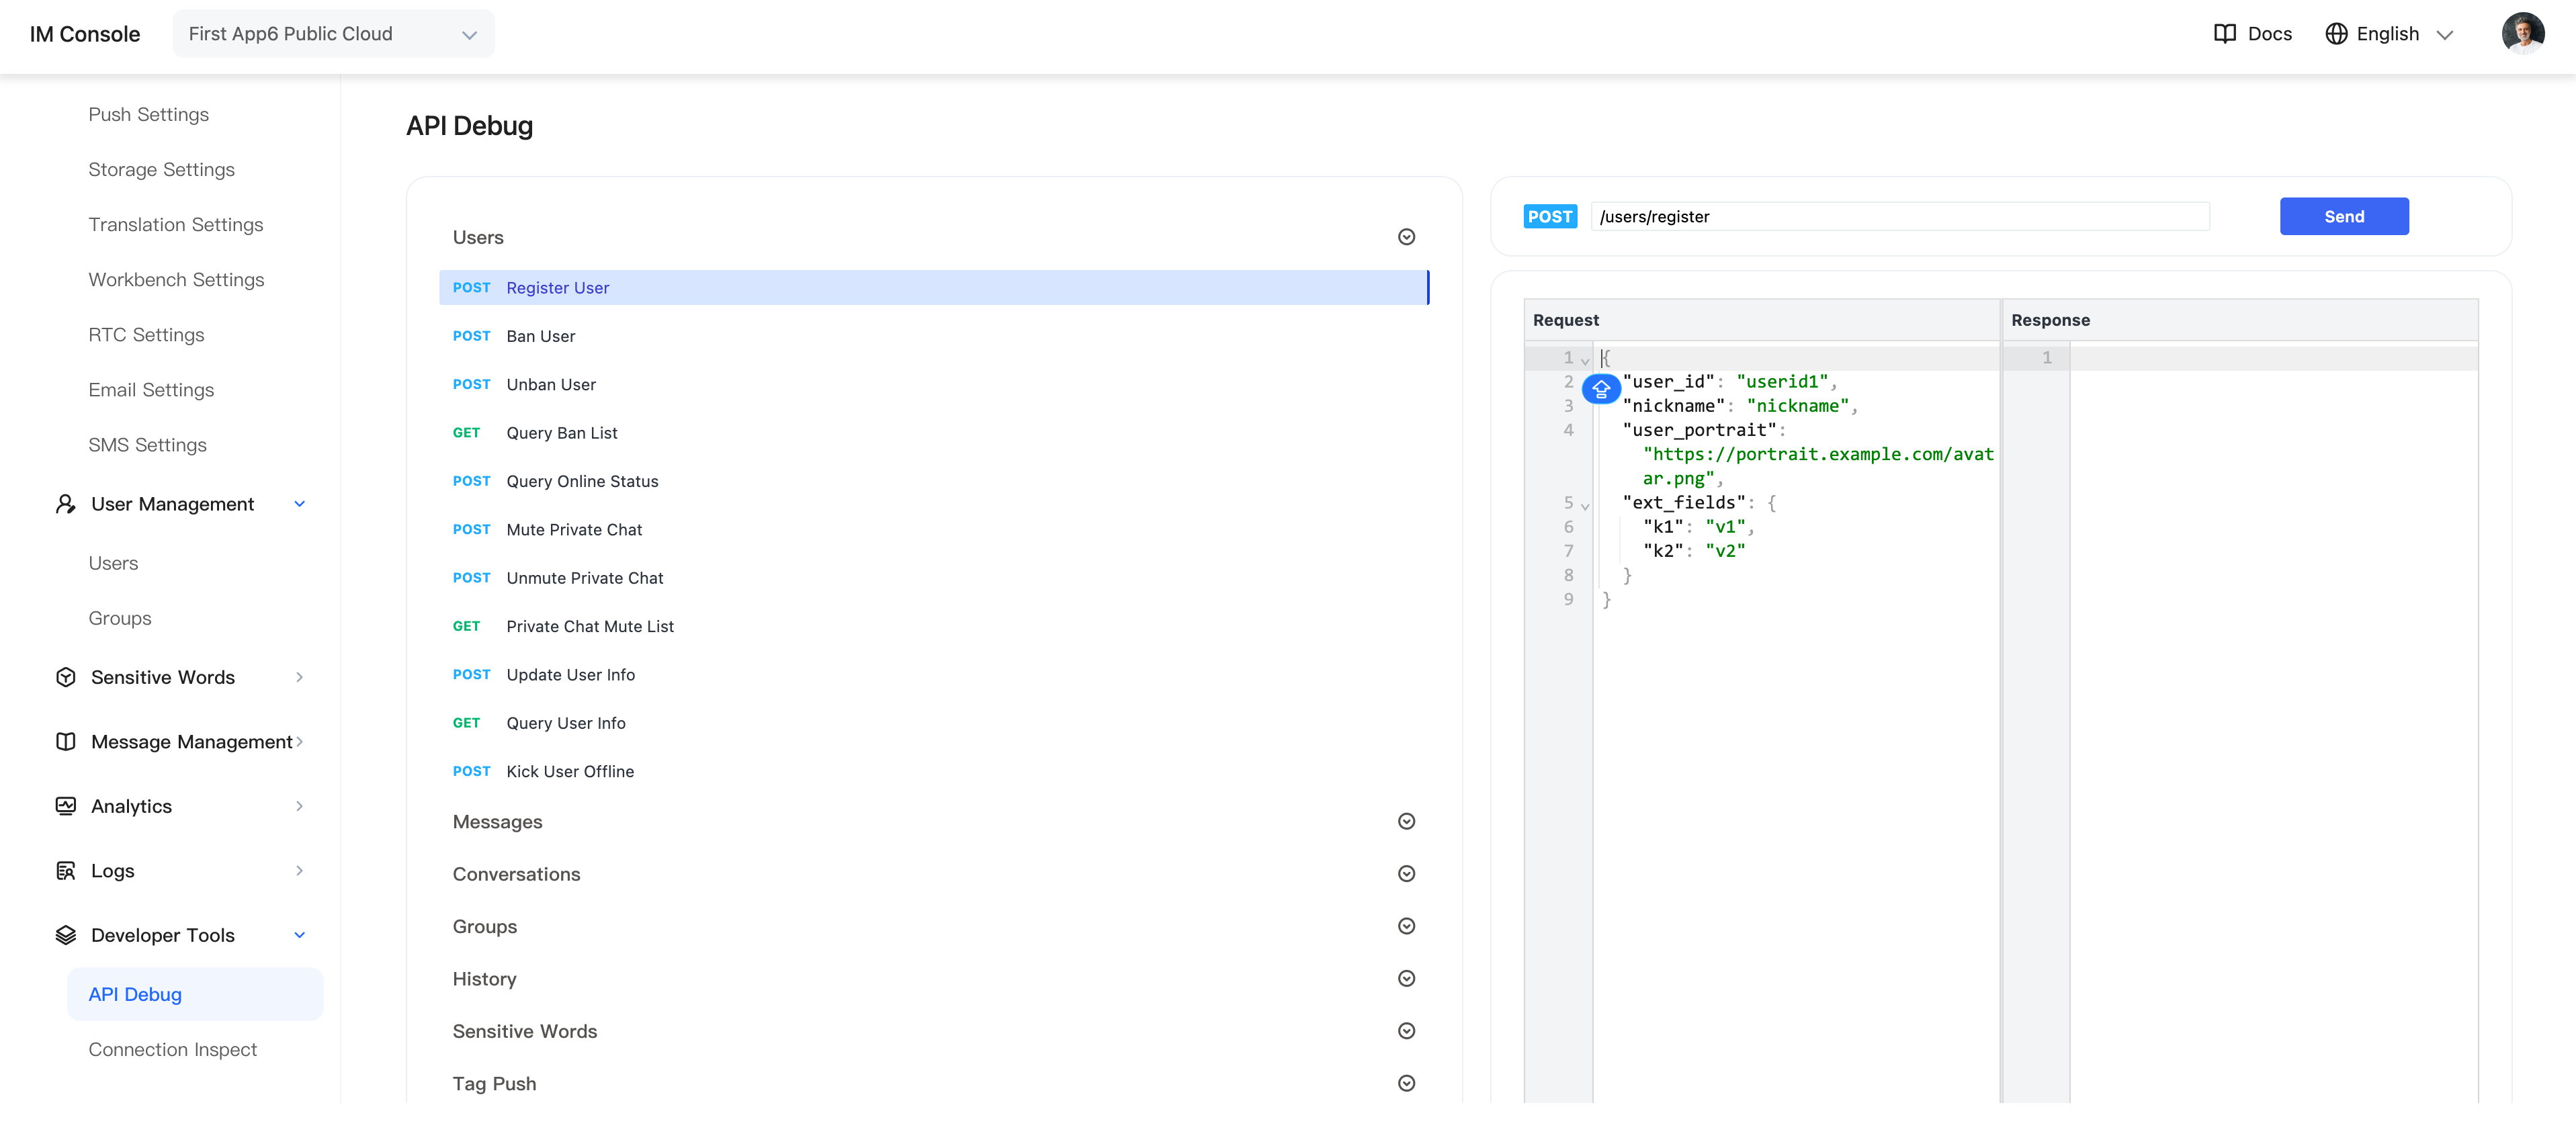
- Call the server API to obtain tokens, or in the Admin Console select Application > Developer Tools > API > Users, then call the user-registration API to obtain two test tokens.
Download juggleim-dev-1.9.0.zip and place
juggleim-dev-1.9.0.jsin the same directory asindex.html.Complete the integration by following the documentation.
Integrate Electron
Follow Electron's official quick-start guide to create a minimal Hello World application, as shown below.
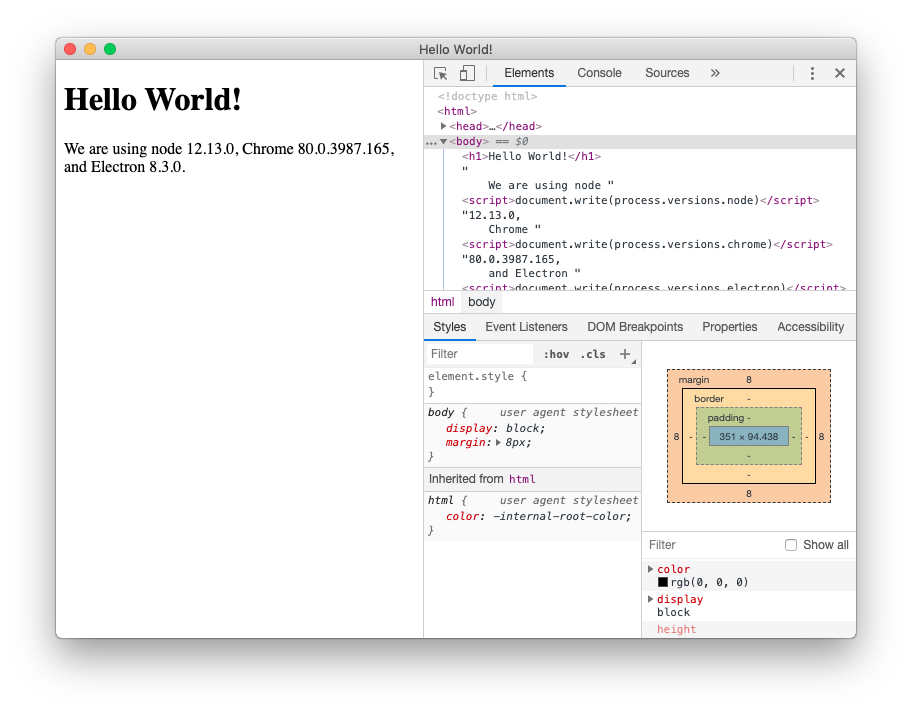
After running the Hello World application successfully, you will have the following files:
main.js: Main-process entry point.
preload.js: Exposes API methods to the renderer process and communicates with the main process.
index.html: Demo page.
package.json: Project dependencies and scripts.
Import the IM SDK
In Electron, the SDK automatically detects the environment and switches to local-storage mode. Import the IM SDK in two steps:
Step 1: Integrate the JavaScript SDK into the web page. Follow Web integration, then replace the content of index.html in the Hello World project with the demo-page content.
Step 2:
// (1) Install dependencies
npm install jim-electron --save

// (2) Import in main.js
const JMain = require('jim-electron/main');

app.whenReady().then(() => {
  const win = new BrowserWindow({
    width: 800,
    height: 600,
    webPreferences: {
      // Important: This must be set to true
      nodeIntegration: true,
      preload: path.join(__dirname, 'preload.js')
    }
  })
  win.loadFile('index.html');

  //open the developer tools
  win.webContents.openDevTools();
  JMain.init();
});

// (3) Import in preload.js; no other action is required
require('jim-electron/render');
Complete Code
After installing the dependencies, copy the following code into index.html, preload.js, and main.js. Then run npm run start in the project root to preview the application.
- index.html
- preload.js
- main.js
<!DOCTYPE html>
<html lang="en">
<head>
  <meta charset="UTF-8">
  <title>IM</title>
  <script src="./juggleim-dev-1.9.0.js"></script>
  <style>
    .container{
      height: 200px;
      width: 600px;
      background-color: rgb(119, 128, 226);
      margin: 200px auto;
      display: flex;
      align-items: center;
      justify-content: center;
      font-size: 40px;
      font-weight: bold;
      border-radius: 10px;
    }
  </style>
</head>
<body>
  <div class="container">Open the browser console to view the result</div>
  <script>
    // prepare basic information
    let appkey = 'Your AppKey';
    let token = 'Your Token';
    // WebSocket domain name or IP address of the private deployment
    let serverList = [
      'https://demo.im.com',
      'http://demo.im.com',
      'http://10.23.31.111:8080',
    ];
    // Step 1: Initialize the SDK; this is required only once globally
    let jim = JIM.init({ appkey, serverList });
    let { Event, ConnectionState, ConversationType, MessageType } = JIM;

    // Step 2: Set the status listener; this is required only once globally
    jim.on(Event.STATE_CHANGED, ({ state, user }) => {
      if(ConnectionState.CONNECTING == state){
        console.log('im is connecting');
      }
      if(ConnectionState.CONNECTED == state){
        // user => { id: 'xxx' }
        console.log('im is connected', user);
      }
      if(ConnectionState.DISCONNECTED == state){
        console.log('im is disconnected');
      }
    });

    // Step 3: Set the message listener; this is required only once globally
    jim.on(Event.MESSAGE_RECEIVED, (message) => {
      console.log(message);
    });

    // Step 4: Connect; call this only once globally. Message and conversation APIs require a successful connection
    jim.connect({ token }).then((result) => {
      console.log(result)
    }, (error) => {
      console.log(error)
    });
  </script>
</body>
</html>
require('jim-electron/render');
const { app, BrowserWindow } = require('electron/main')
const path = require('node:path')
const JGMain = require('jim-electron/main');
function createWindow () {
  const win = new BrowserWindow({
    width: 800,
    height: 600,
    webPreferences: {
      nodeIntegration: true,
      preload: path.join(__dirname, 'preload.js')
    }
  })

  win.loadFile('index.html')
  win.webContents.openDevTools();
}

app.whenReady().then(() => {
  createWindow()
  JGMain.init();
})

app.on('window-all-closed', () => {
  if (process.platform !== 'darwin') {
    app.quit()
  }
})
Preview the Project
npm run start